Modeling#
The first step of MBT is modeling.
Modeling is the process of translating the behavior and functionalities of the SUT into an abstract model. We call it an abstract model because it should be much smaller and simpler than the SUT itself. It should focus on just the aspects that you want to test and should omit any other details of the SUT.
Model Design#
The objective of the model, is to express the expected behavior of the SUT.
A model is reminiscent of the concept of a Finite-State Machine or a Directed Graph, in which a vertex (or a node) represents some desired state, and the edges (arcs, arrows, transitions) represents whatever actions we need to do in order to get to the desired state.
Each vertex and edge has an associated method in the test code that is executed when the element is reached.
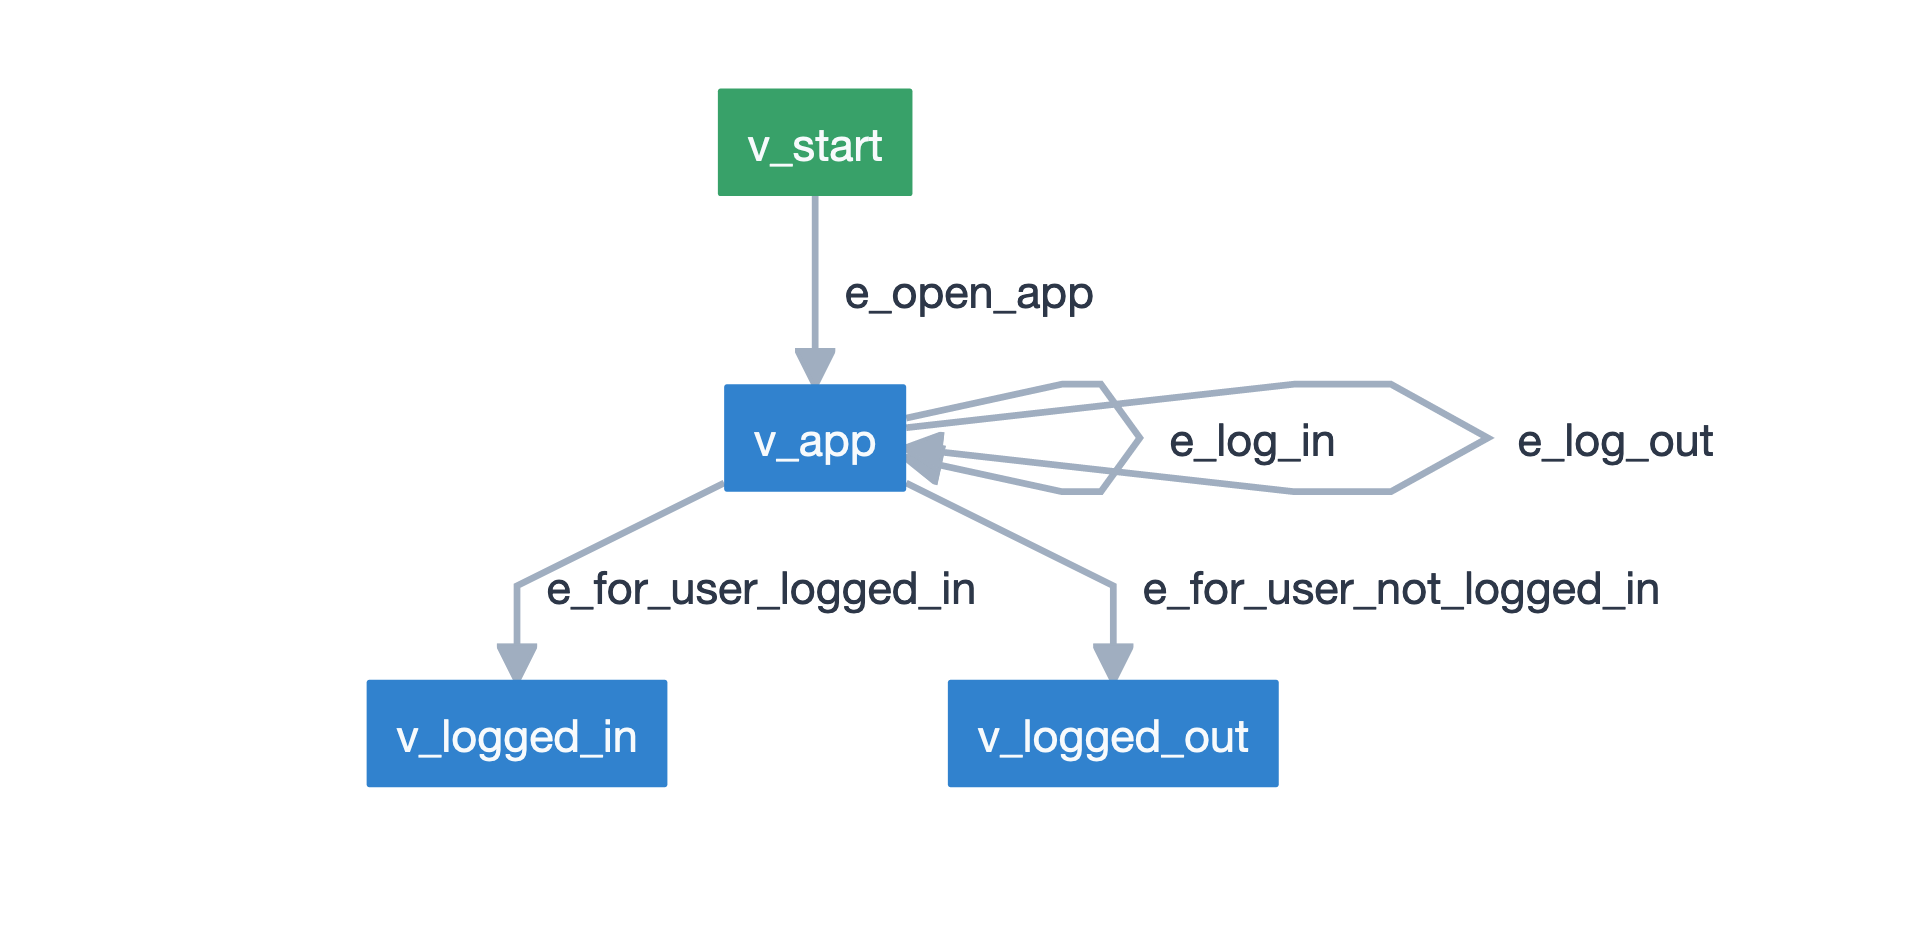
A simple model visualized as a directed graph.#
Vertices#
A vertex is a state of the system under tests. In the test code this is the place where the actual test (asserts) takes place.
Edges#
An edge is an action that takes the system under tests form one state (vertex) to another.
Generators and Stop Conditions#
Generators and stop conditions are how GraphWalker decides how to travel the model(s) (directed graph) and when the path (test sequence) is completed.
A generator is an algorithm that decides how to traverse a model. Different generators will generate different test sequences, and they will navigate in different ways.
A stop condition is responsible for deciding when a path is completed. The generator will generate a new step in the path until the stop condition is met.
Examples
random(never)
weighted_random(time_duration(100))
a_start(reached_vertex(vertex_A))
Note
Throughout the documentation a pair of a generator and a stop condition is usually referred as a stop condition.
Further Reading/Useful Links
Read more on Generators and Stop Conditions in the Path Generation section.
For documentation about Generators and Stop Conditions check GraphWalker’s documentation
Actions#
GraphWalker keeps an execution context with data for each model and a global context.
By default GraphWalker tries to access data from the current model context. To access
data from the global context, prefix the variable name with global. (e.g. global.count,
global.isLoggedIn).
An action is a piece of JavaScript code that you want the model to execute, in order to modify the data from the context.
Actions can only be placed at an edge or model level. Actions from the model level are executed once, and actions defined on an edge are executed every time the edge is reached.
Tip
Always initialize your variables in the models level actions.
Note that you can also initialize variables in the global context.
Example
{
    "actions": [
        "numOfPets++;",
        "isLoggedIn = true;"
    ]
}
And to update variable from the global context:
{
    "actions": [
        "global.numOfPets++;"
    ]
}
Note
Each action must end with ; (e.g. count++;, isLoggedIn = true;).
Further Reading/Useful Links
Read more on How to: Use actions and guards section.
Guards#
A guard marks an edge as unreachable until the condition it specifies is met. The guard is expressed using the data from the context.
Guards can only be placed on edges.
Example
{
    "guard": "numOfPets > 0"
}
Like with actions if you want to use data from the global context, prefix the variable name with global..
{
    "guard": "global.numOfPets > 0"
}
Further Reading/Useful Links
Read more on How to: Use actions and guards section.
Formats#
AltWalker like GraphWalker supports two formats for models:
json
grapml
JSON#
The template for a json file:
{
    "name": "<Name of the test suite>",
    "models": [
        {
            "<MODEL IN JSON FORMAT>"
        },
        {
            "<MODEL IN JSON FORMAT>"
        }
    ]
}
Multiple models and their data can be stored in one single json file.
Model#
The template for a model:
{
    "generator": "<The generator of the model>",
    "id": "<The unique id of the model>",
    "name": "<The name of the model>",
    "actions": [
        "<ACTION IN JSON FORMAT>",
        "<ACTION IN JSON FORMAT>"
    ],
    "edges": [
        "<EDGE IN JSON FORMAT>",
        "<EDGE IN JSON FORMAT>"
    ],
    "vertices": [
        "<VERTEX IN JSON FORMAT>",
        "<VERTEX IN JSON FORMAT>"
    ]
}
actionfield is optional.
Vertex#
The template for a vertex:
{
    "id": "<The unique id of the vertex>",
    "name": "<The name of the vertex>",
    "sharedState": "<SHARED STATE NAME>",
    "properties": {
        "blocked": "true/false",
        "key1": "<value1>",
        "key2": "<value2>"
    },
    "requirements": [
        "<Requirement Tag>",
        "<Requirement Tag>"
    ]
}
sharedStatefield is optional, it can be used to link to vertices from different models. Any vertices with the same value forsharedStateare linked.propertiesfield is optional, it can be used to store pairs of key/data.properties.blockedfield is optional, if set and the commands are run with the--blockedflag the vertex will be filtered out of the path selection.requirementsfield is optional, it can be used to set tags on vertices and use them withrequirement_coverage.Read more about
requirementson Requirement Coverage.
Edge#
The template for an edge:
{
    "id": "<The unique id of the edge>",
    "name": "<The name of the edge>",
    "sourceVertexId": "<The id of the source vertex of this edge>",
    "targetVertexId": "<The id of the target, or destination vertex of this edge>",
    "guard": "<The conditional expression which enables the accessibility of this edge>",
    "actions": [
        "<ACTION IN JSON FORMAT>",
        "<ACTION IN JSON FORMAT>"
    ],
    "weight": "<The weight>",
    "dependency": "<The dependency>",
}
guardfield is optional, it can be used to set a guard on this edge.actionsfield is optional.weightfield is optional, it can be used to set weights and use them with weighted_random.Read more about
weighton Weighted Random.dependencyfield is optional, it can be used to set dependencies and use them with dependency_edge_coverage.Read more about
dependencyon Dependency Edge Coverage.
Action#
The template for an action:
{
    "actions": [
        "<JavaScript>;",
        "<JavaScript>;"
    ]
}
Is a piece of JavaScript code that you want the model to execute.
It has to end with a semicolon (;).
Further Reading/Useful Links#
For documentation about json format check GraphWalker documentation.
For creating or modifying json models you can use AltWalker’s model editor.
GraphML#
GraphML is an XML-based file format for graphs.
A single model and his data can be stored in one single .graphml file. The name of the
model is the name of the file (e.g. for login.graphml the name of the model is login).
Recommendation
If you intent to use the graphml format we recommend considering using the json format. AltWalker is mainly tested using json models and all the example from the
documentation use the json format.
If you have models in the graphl format we recommend converting them using the convert command form GraphWalker.
Example
$ gw convert -i login.graphml -f json
Further Reading/Useful Links
GraphML file format.
For documentation about the
.graphmlmodel format check GraphWalker’s documentation on Using yEd.For creating or modifying graphml models you can use yEd editor.
Checking the models#
You can also check for issues in the model(s) using the check command:
$ altwalker check -m path/to/model.json "generator(stop_conditions)"
Examples
$ altwalker check -m models/login.json "quick_random(vertex_coverage(100))"
Checking models syntax:

  * models/login.json::LoginModel [PASSED]

Checking models against stop conditions:

  No issues found with the model(s).
$ altwalker check -m models/invalid.json "quick_random(edge_coverage(100))"
Checking models syntax:

  * models/invalid.json::InvalidModel [FAILED]

      Id 'e_0' is not unique.
Tooling#
Tools for JSON#
For JSON you can check AltWalker’s Model-Editor, the editor allows you to visualize and edit your models.
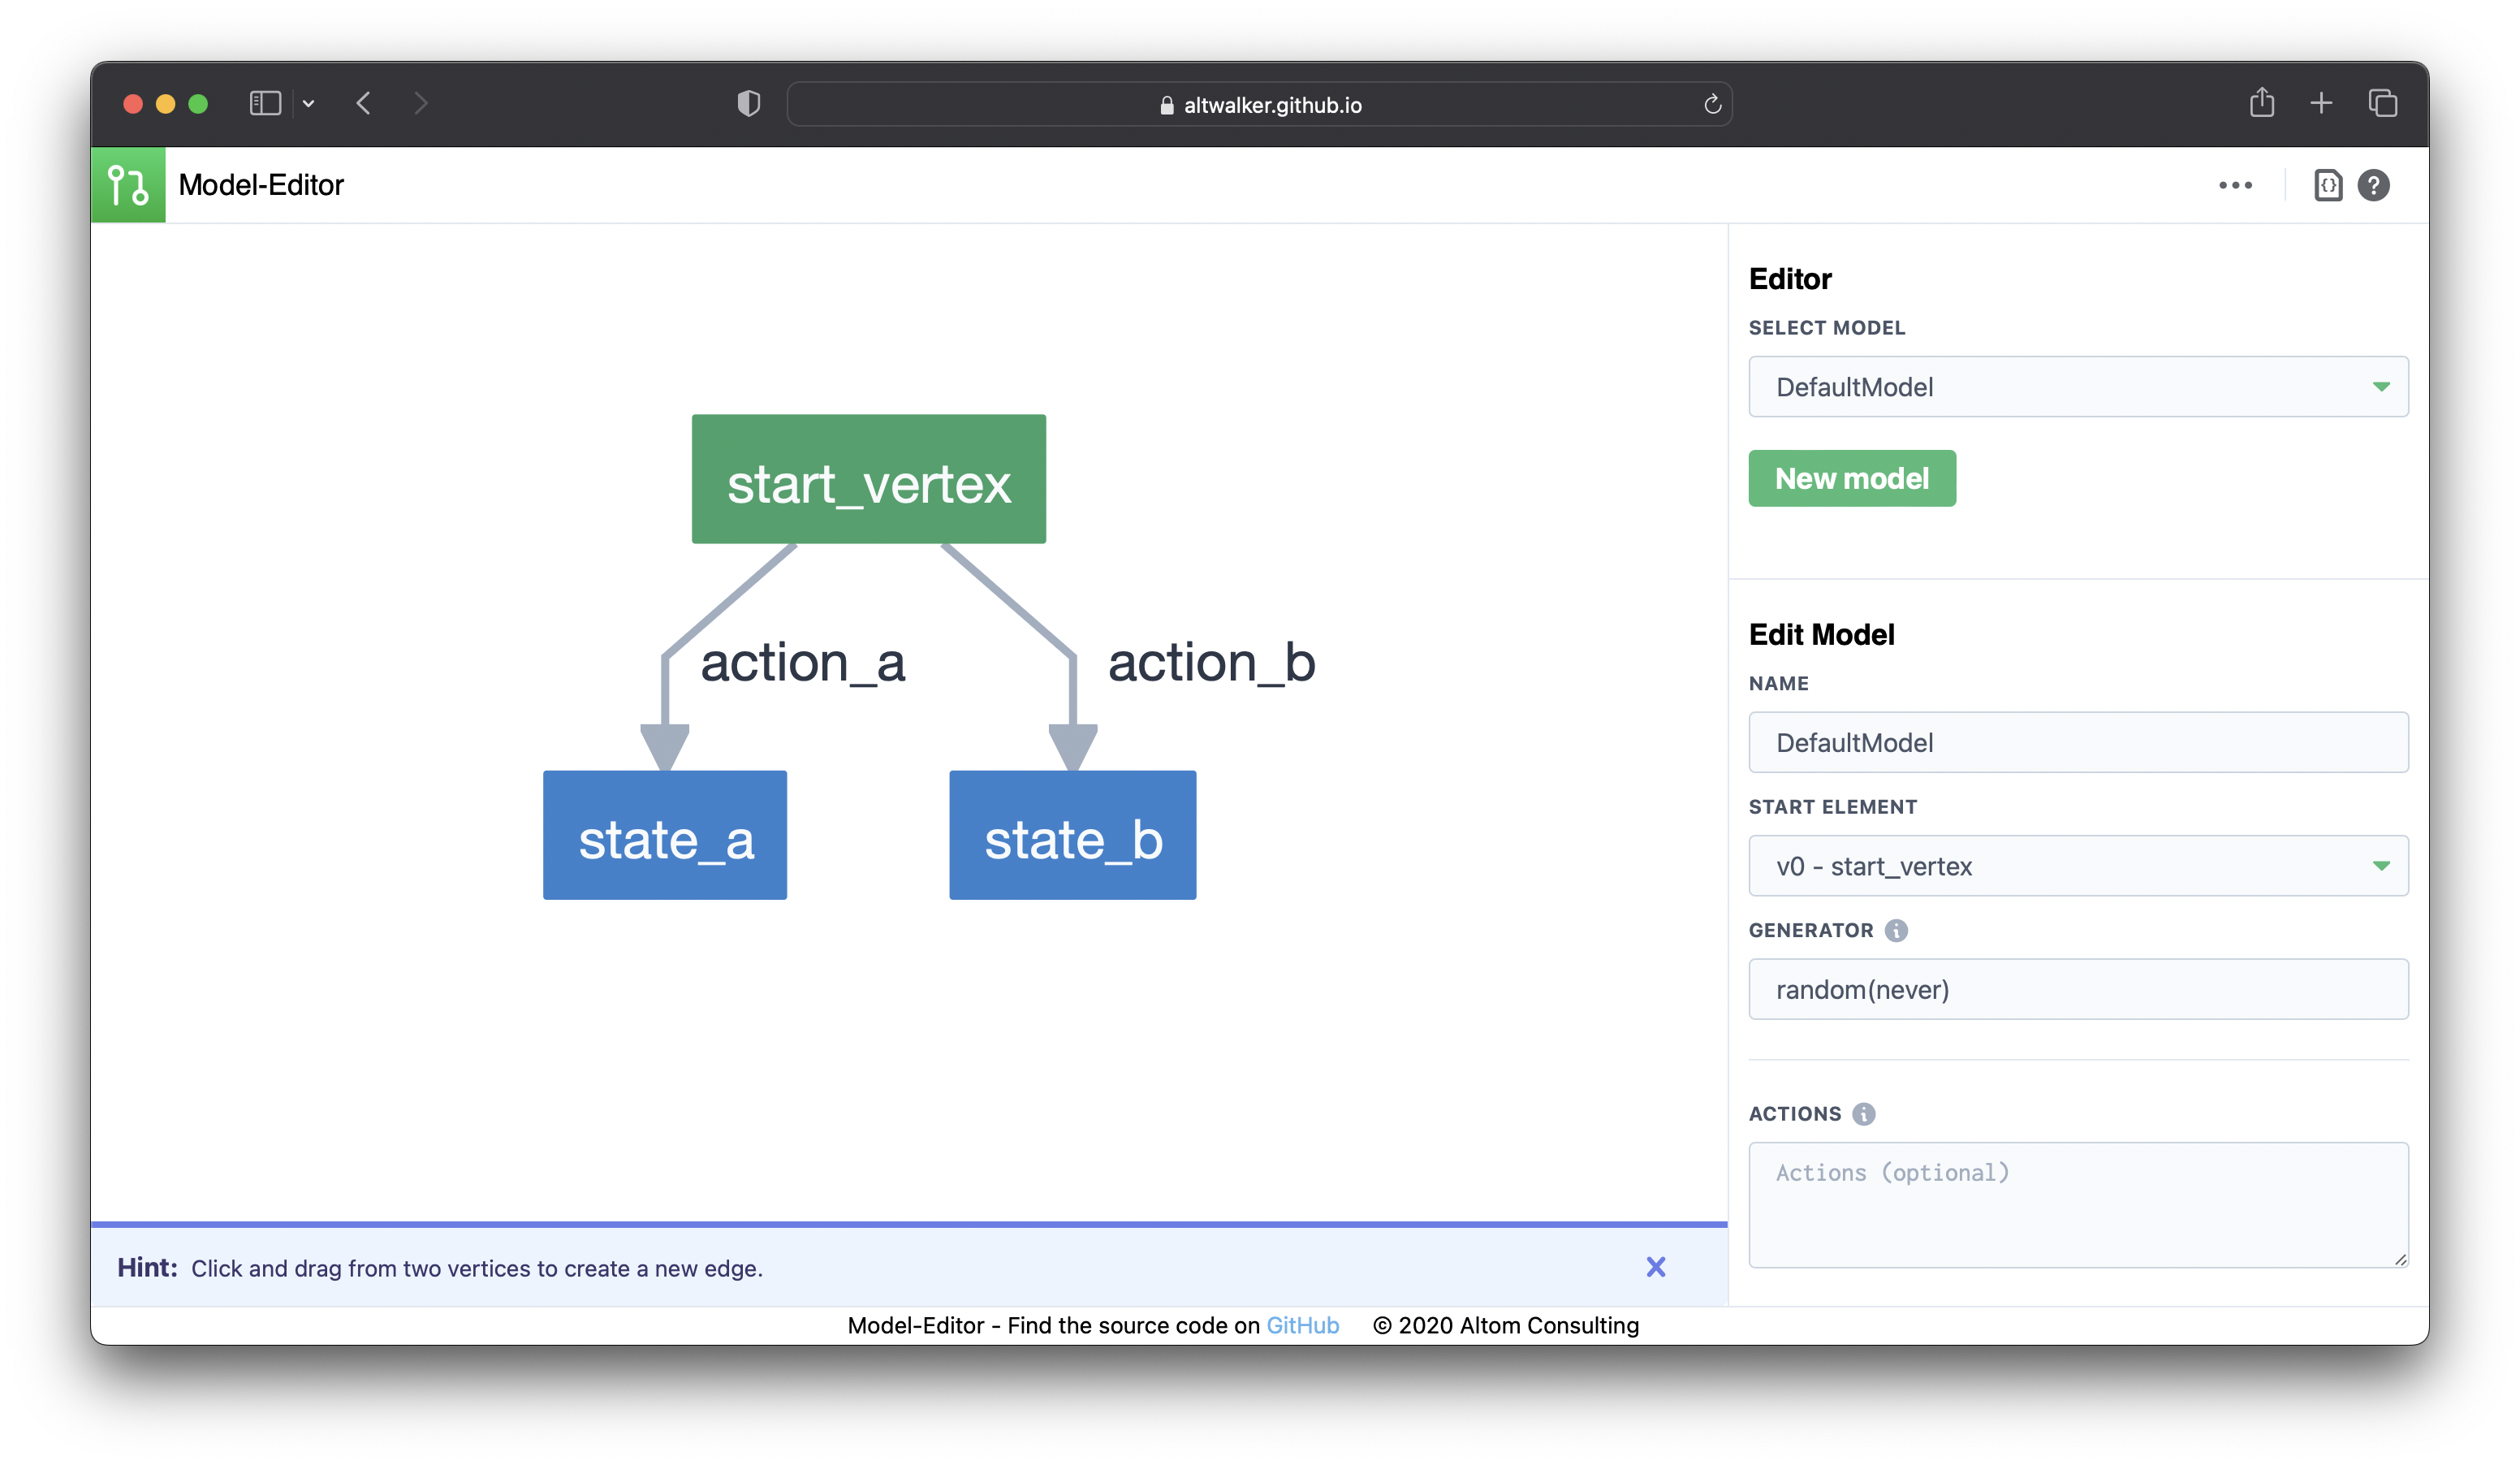
Screenshot taken from the Model-Editor.#
And if you are using VS Code you can check out the AltWalker’s Model-Visualizer Extension, the extension allows you to visualize your model while you are working on it.
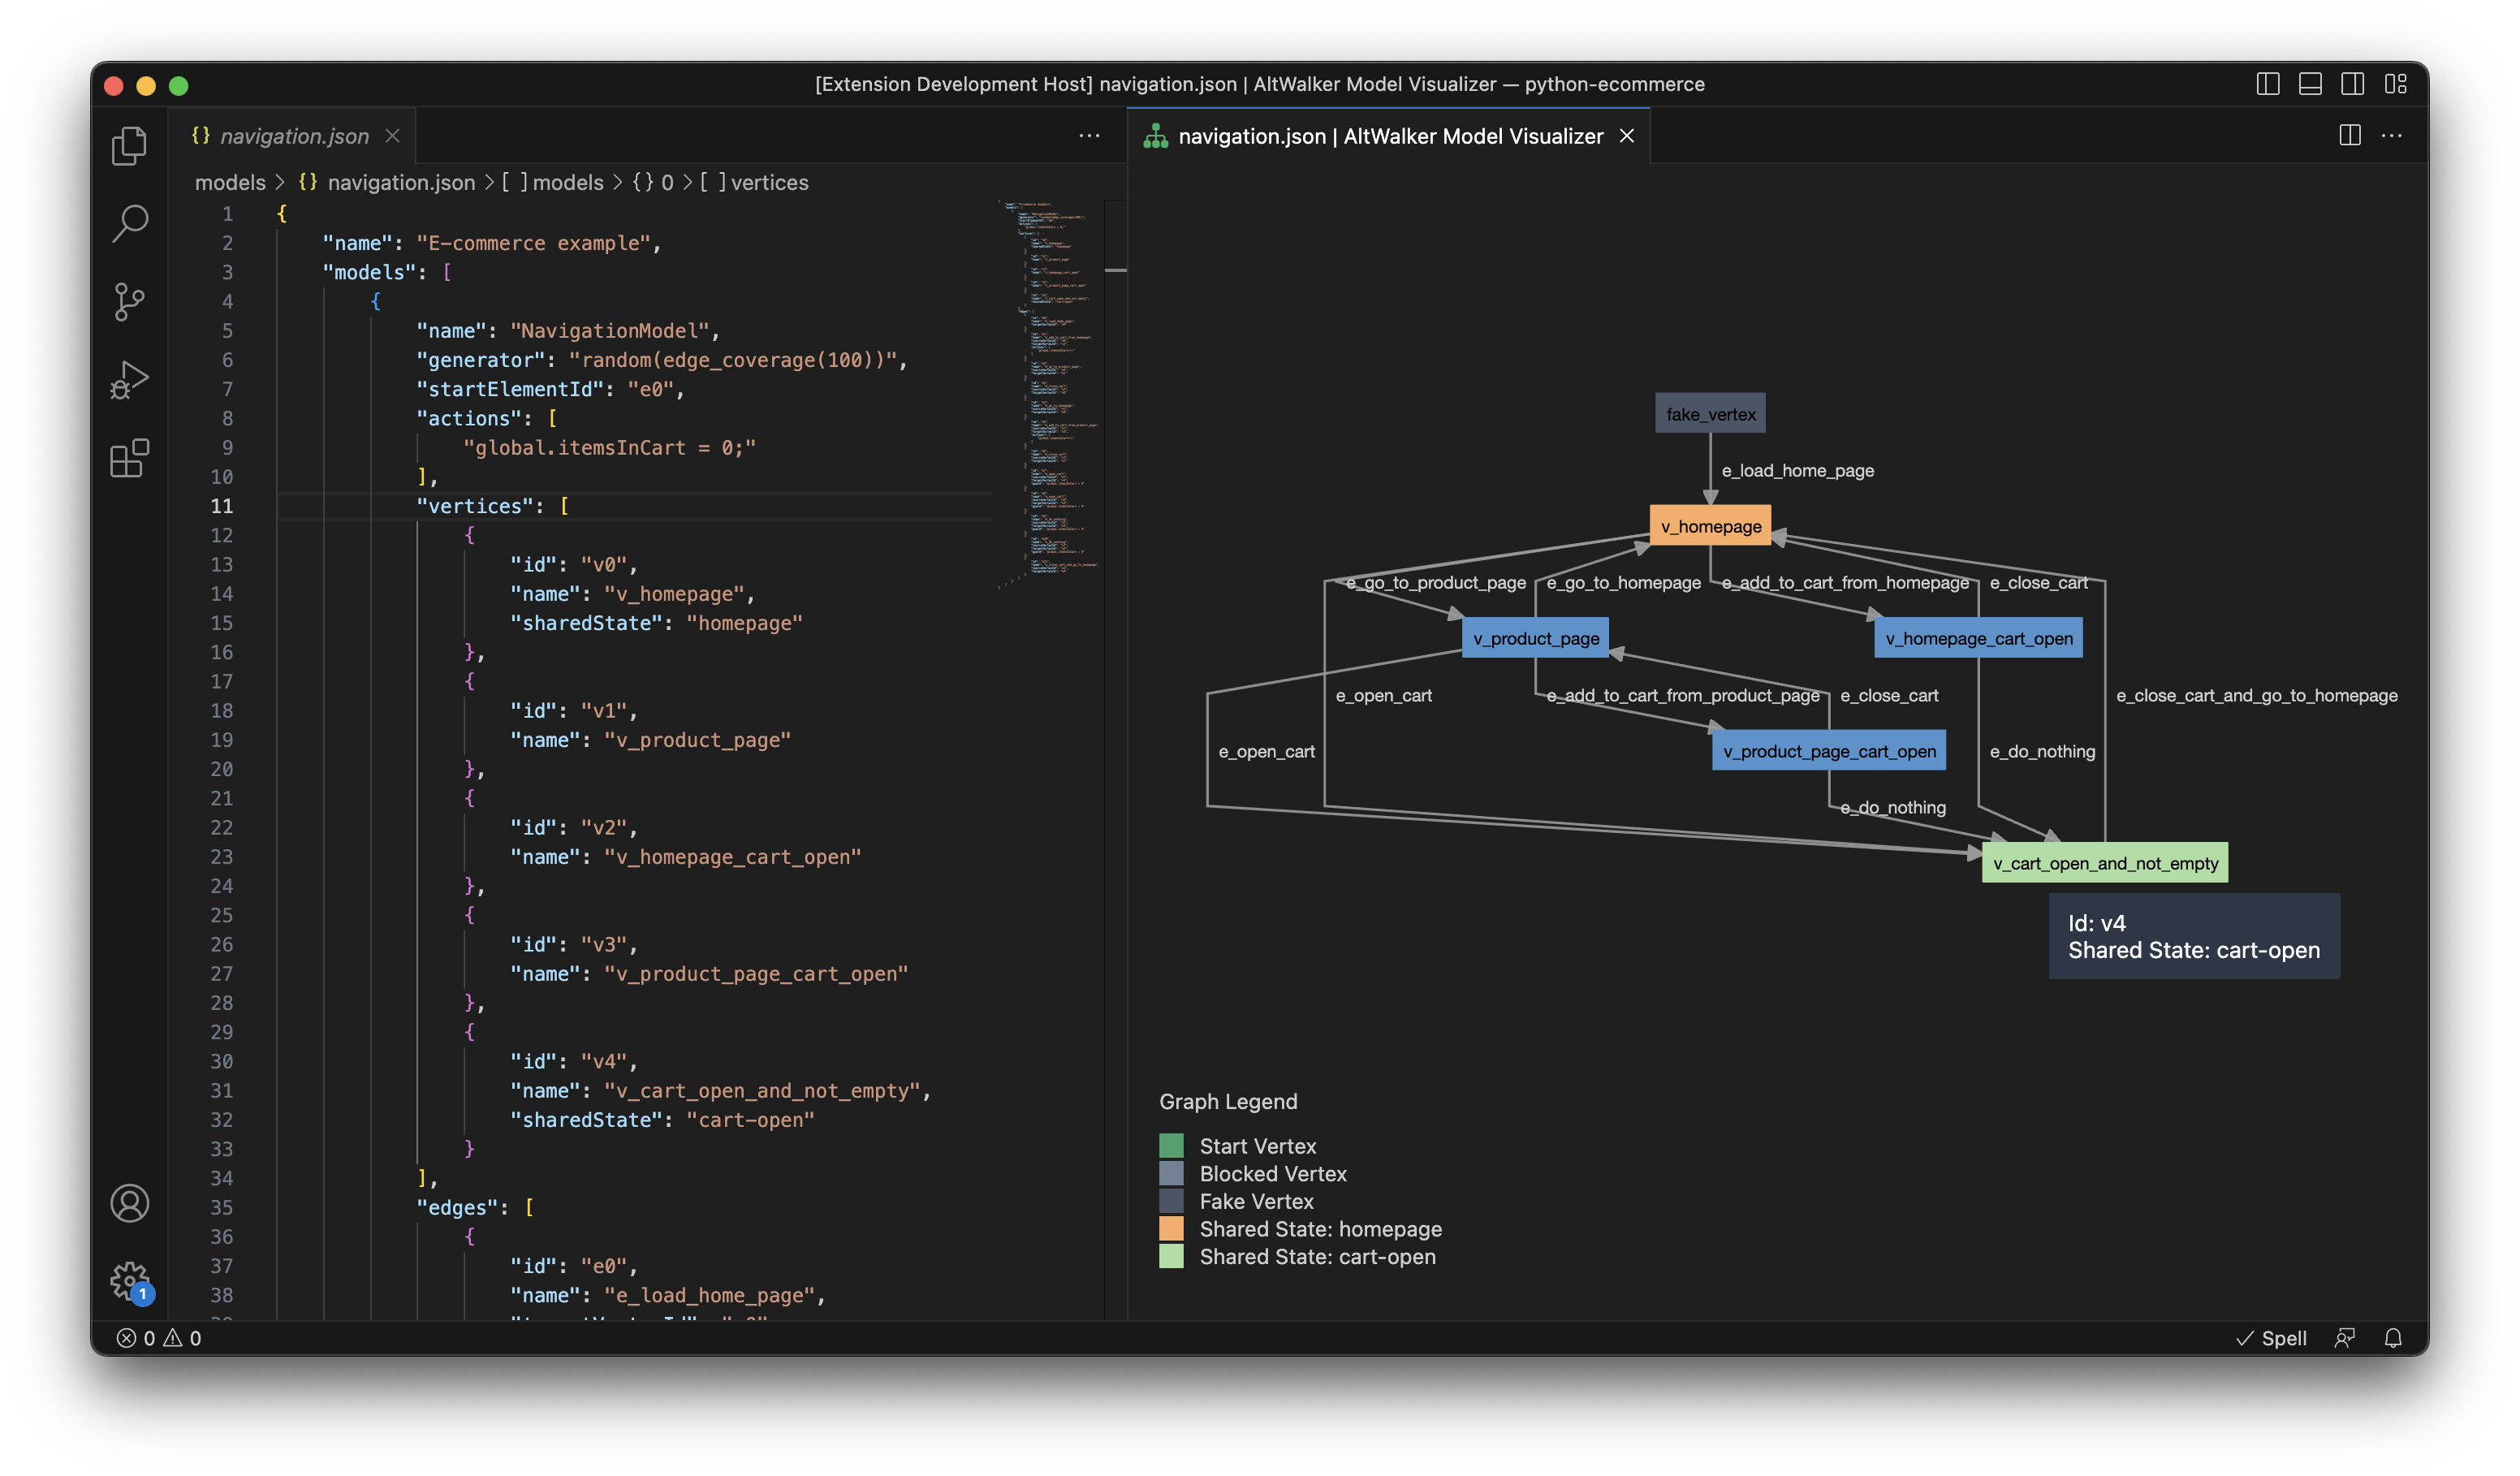
Screenshot taken from the AltWalker Model-Visualizer VS Code Extension.#
Tools for GraphML#
For GraphML you can use yEd editor and GraphWalker has a tutorial on how to design models using it.